 Bitcoin Board
If you are looking for a Bitcoin miner, then the ASICMiner USB Block Erupter must have crossed your path at some point, as these low cost USB miners are extremely popular and a must have for every Bitcoin mining fan. A question I get asked a lot is: How do I go about installing and setting up a USB Bitcoin Miner?
Well, First we are going to start with connecting the miners to your computer. If you have more then 2 Block Erupters, I would advice you to get a powered USB hub with 10 ports or something like that. This gives you more options to expand your mining operation with more Erupters when you want, and its also the best and most efficient way to cool them with a fan. You can take any USB fan, and just plug it in the powered USB hub, like in the picture below.
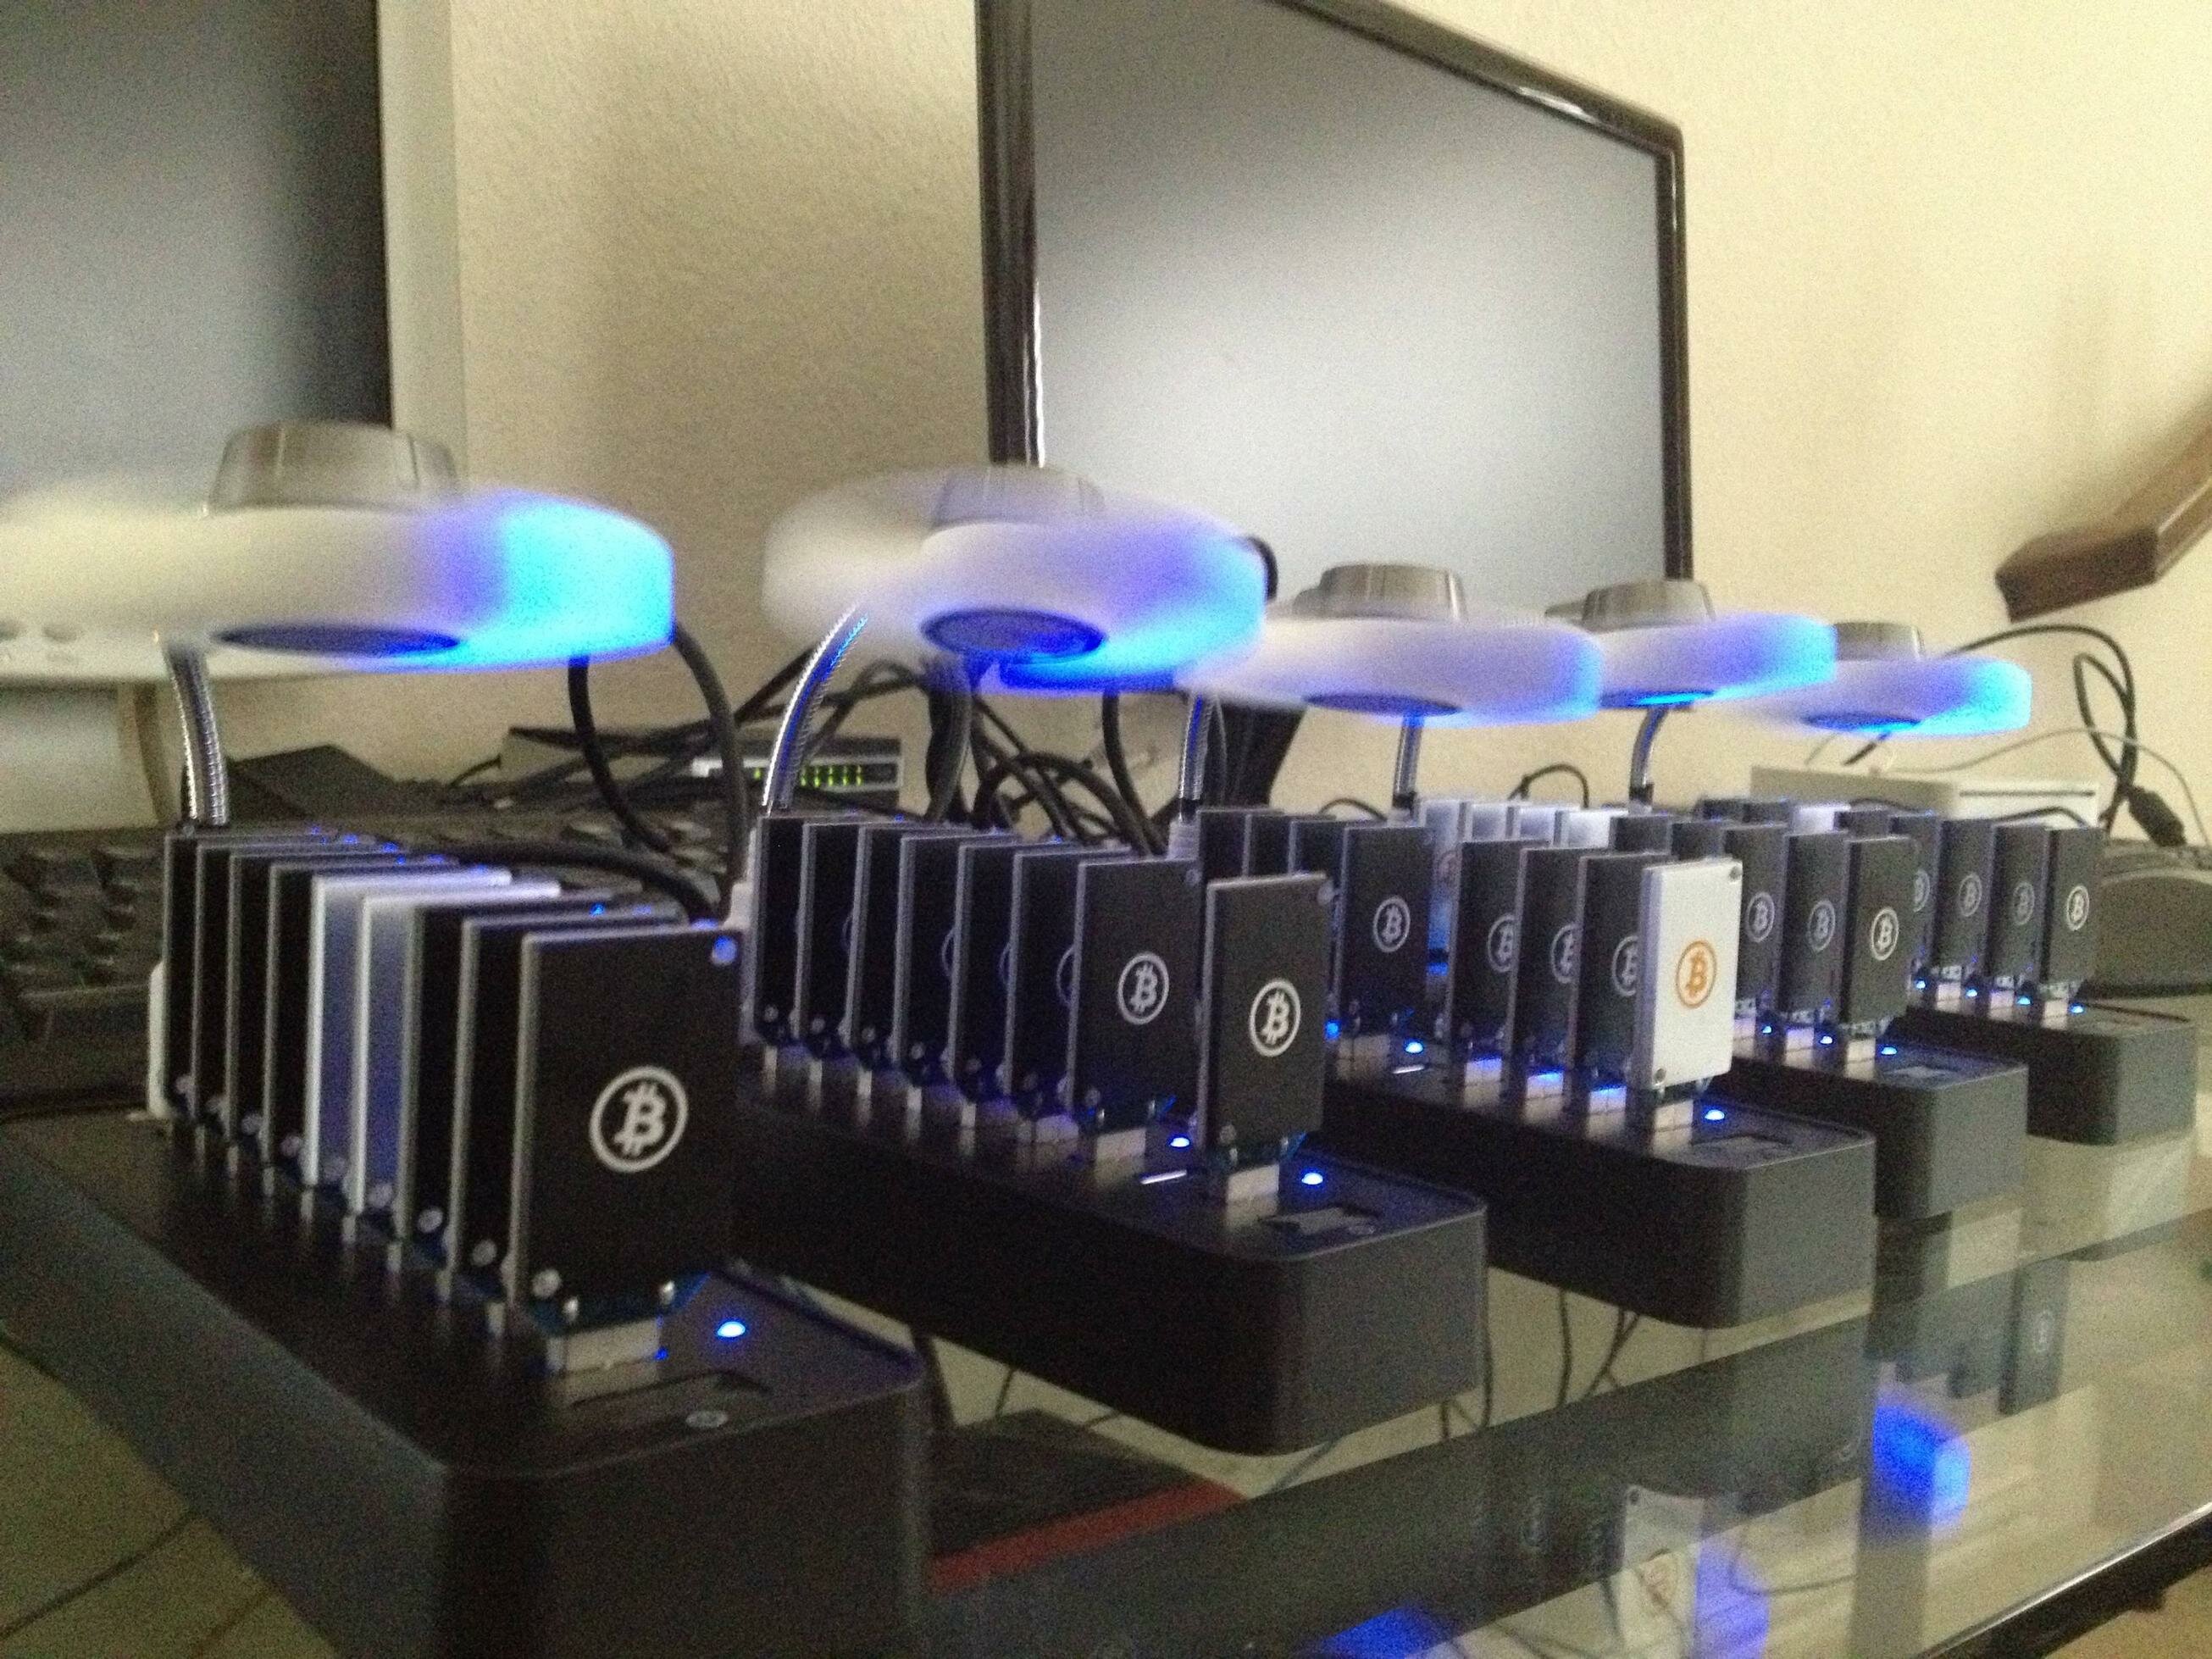
With an advanced setup like the one in the picture above, you can run the miners 24/7 without encountering any cooling or other problems. However, this will take a lot of power cost if you plan to host the USB hubs on your computer. To reduce power costs and noise I advice you to run them on a Raspberry Pi. It will take almost no power, and it will certainly make no noise. We have also written an advanced guide to make a Raspberry Pi miner.
After you have connected the Block Erupters to your PC via the USB hubs, you need to install the driver for them to work if you haven’t downloaded it yet. You can find the driver on Silabs.com. If you have installed the driver correctly, you will see that the USB Miners are now detected by windows and displayed in your list of devices. You can see this list of devices by going to your control panel, and selecting “Devices & Printers”.
You can now safely run CGMiner. Be sure to start the cgminer-nongpu.exe, to ensure that your PC’s GPU isn’t starting while mining with the USB’s. CGMiner will automatically detect your Erupters, and you can proceed to type in your Pool information to start hashing.


 Mining Rig")
